Diamonds Under Glass: The Complete Jewelry Photography & Retouching Playbook
Jewelry is notoriously difficult to capture. Master macro lighting, reflection gradients, and focus stacking for flawless luxury presentations.
ServicesPublished February 22, 202610 min readBy the Reframe Visuals editors
Why Jewelry Breaks Every Rule
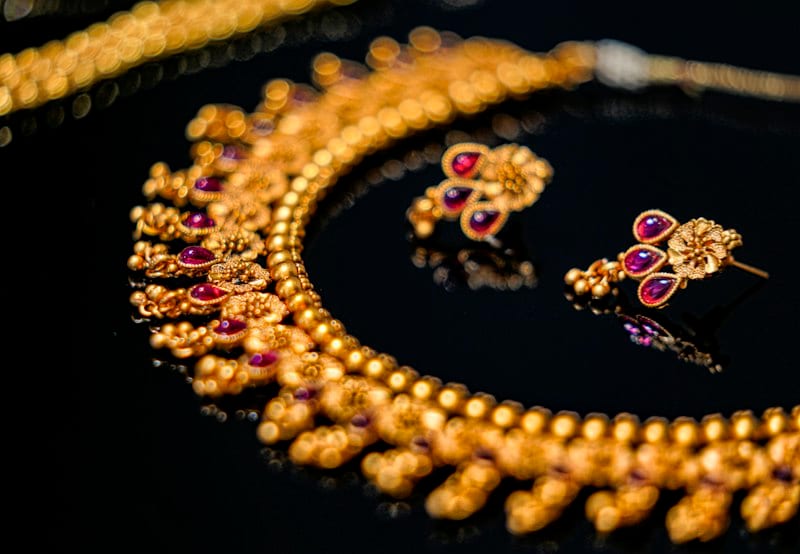
Jewelry photography is the extreme sport of product imaging. Every technique that works for regular products fails spectacularly with jewelry:
Photographing fine jewelry, luxury watches, or reflective gemstones?
Don't let microscopic dust, metal micro-scratches, or lens glare dull your listings. Get 3 free sample jewelry edits by Reframe Visuals — complete with stone fire enhancement and two-editor QA.
- Standard lighting creates harsh reflections that obscure the metal surface
- Standard focus produces images where half the piece is blurry
- Standard retouching leaves microscopic dust and scratches visible at zoom
- Standard backgrounds fail to properly expose both the bright metal and dark gemstones
This is why jewelry has the highest per-image editing cost of any product category-and why the gap between amateur and professional jewelry images is the widest in eCommerce.
The Lighting Setup: The Tent Method
The foundation of all professional jewelry photography is the Light Tent (also called a light box or scrim):
- The Tent: A white, translucent enclosure (18-30" depending on piece size) that surrounds the product on all sides.
- External Lights: 2-3 lights positioned outside the tent, pointing at the walls. The tent diffuses the light into a soft, even envelope.
- The Black Card: A small piece of black card inserted inside the tent to create a controlled "gradient reflection" on the metal surface. This is the secret that separates professional jewelry shots from amateur ones.
The black card technique works because polished metal is essentially a mirror. Without the card, the metal reflects pure white from the tent, looking flat and featureless. The black card creates a dark-to-light gradient that defines the metal's curvature and makes it look three-dimensional.

Focus Stacking: The Non-Negotiable
At macro distances, even f/11 produces a depth of field of 3-5mm. A typical ring is 15-20mm deep. The math is clear: a single shot cannot get the entire piece in focus.
The professional workflow:
- Mount the camera on a focusing rail (not a tripod head-you need micrometer precision)
- Set the focus on the nearest point of the jewelry
- Advance the rail 1-2mm. Take a shot.
- Repeat until the farthest point is in focus (typically 12-25 shots)
- Stack in Photoshop using Auto-Align + Auto-Blend
Our Jewelry Retouch team then refines the stacked composite, cleaning up any alignment artifacts and ensuring seamless transitions between focus planes.
The 5-Stage Retouching Protocol
After capture, every piece goes through a 5-stage protocol:
Stage 1: Dust and Debris Removal At 500% zoom, even a freshly cleaned piece reveals microscopic particles. We remove every speck using the Healing Brush at pixel-level precision.
Stage 2: Metal Surface Reconstruction Scratches, fingerprints, and polishing marks are removed using custom gradient painting. We don't blur the surface-we rebuild it, following the mathematical curvature of the metal.
Stage 3: Gemstone Enhancement The "Facet Fire" protocol: we sharpen individual facet edges and selectively enhance spectral highlights to restore the diamond's fire that the camera sensor failed to capture.
Stage 4: Prong and Setting Cleanup Settings and prongs accumulate shadows, casting artifacts, and micro-debris. We clean and align every prong for structural symmetry.
Stage 5: Background and Shadow Professional Background Removal followed by Shadow Creation appropriate to the piece. Rings typically get a soft reflection shadow implying a polished surface. Necklaces get a natural drop shadow.
| Stage | Time Per Image | Zoom Level | Tools Used |
|---|---|---|---|
| Dust Removal | 10-15 min | 500% | Healing Brush, Clone Stamp |
| Metal Rebuild | 15-25 min | 300% | Custom gradients, Dodge/Burn |
| Gem Enhancement | 10-20 min | 400% | Curves, selective sharpening |
| Prong Cleanup | 5-10 min | 500% | Clone, Liquify |
| BG + Shadow | 5-10 min | 100% | Pen tool, gradient shadow |
The "Warm vs. Cool" Metal Decision
Different metals require different color treatment:
- Yellow Gold: Warm white balance (5200-5400K). Shadows should have a subtle amber undertone.
- White Gold/Platinum: Cool white balance (5800-6200K). Shadows should be neutral grey.
- Rose Gold: Balanced-warm (5400-5600K). Shadows should be slightly pink.
- Sterling Silver: Cool-neutral (5600-6000K). Must avoid yellowing.
Professional Color Correction ensures each metal type is rendered with the correct temperature and undertone-maintaining the material's true character across your entire collection.
The $10,000 Question
For luxury jewelry, the product image must justify the price tag. A poorly lit, dusty, slightly blurry photo of a $10,000 engagement ring destroys the perceived value. The customer's brain calculates: "If they can't be bothered to photograph it properly, how careful were they when making it?"
Conversely, a flawlessly retouched, brilliantly lit, pixel-perfect image creates a "Proof of Mastery" that extends from the photography to the craftsmanship itself. The image becomes evidence of the quality the customer is paying for.
- Lighting: Tent method with black card reflections. Always.
- Focus: Stack 15-25 shots. Never rely on a single exposure.
- Retouching: 5-stage protocol, 45-80 minutes per hero image.
- Color: Metal-specific white balance for every piece.
Jewelry is a masterpiece of craftsmanship. Its photography must be a masterpiece of equal caliber.
Get an exact price for your images.
Tell us your volume and the edits you need. We reply with a price, and you can send sample images to make it exact.